
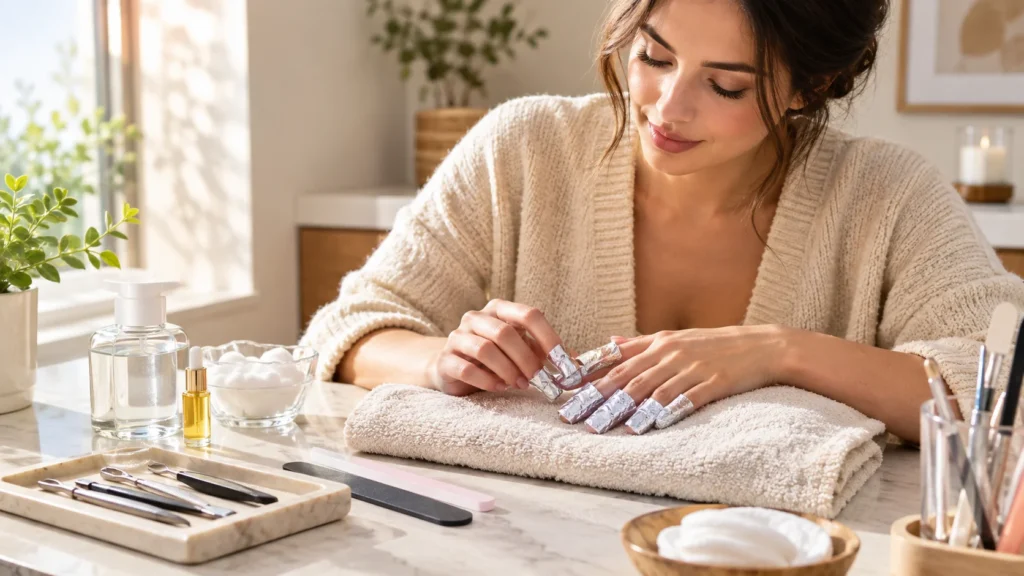
Acrylic nails are meant to come off eventually, but how they come off matters just as much as how they went on. Peel them off the wrong way and you can strip layers off your natural nail along with the product, leaving nails thin, weak, and painful for weeks. This guide walks through the actual safe method for removing acrylic nails — whether you’re doing it at home or deciding it’s time to book a professional appointment — so you can get your natural nails back without the damage that comes from doing it the impatient way.
Quick Answer: Can You Remove Acrylic Nails at Home?
Yes, acrylic nails can generally be removed safely at home using the acetone soak-off method: filing down the top layer of the acrylic, then soaking nails in 100% pure acetone (typically wrapped in acetone-soaked cotton and foil) for roughly 20 to 40 minutes until the product softens enough to gently slide or scrape off. The key word is gently — peeling or prying off acrylic before it’s fully softened is the main cause of nail damage during removal, not the acetone itself.
Why Removal Method Matters for Nail Health
The reputation acrylic nails have for damaging natural nails almost always comes down to removal technique, not the product itself. Acrylic is bonded tightly to the nail plate’s surface, and when it’s peeled or pried off before being properly dissolved, that bond pulls away thin layers of the natural nail along with it — leaving the nail underneath thin, rough, and more prone to peeling, breaking, or feeling sensitive for weeks afterward.
Acetone, when used correctly, actually protects against this outcome rather than causing it: by dissolving the acrylic’s bond gradually, it allows the product to be removed without forcibly separating it from the nail plate. This is the core reason why a proper soak-off method, even though it takes longer than simply prying the acrylic off, produces significantly healthier results.
What You’ll Need Before You Start
Before beginning at-home removal, gather these materials:
- 100% pure acetone (not standard nail polish remover, which is typically diluted and far less effective at breaking down acrylic)
- A coarse nail file or buffer, to break the acrylic’s top seal before soaking
- Cotton balls or pads, sized to cover each nail
- Aluminum foil, cut into small squares to wrap around each finger
- A cuticle pusher or orange stick, for gently checking and removing softened product
- Cuticle oil or a moisturizing hand cream, for immediate aftercare once the acrylic is off
Acetone is a strong solvent, so working in a well-ventilated space and avoiding prolonged skin contact beyond what’s necessary for the nails themselves is a sensible precaution throughout the process.
How to Remove Acrylic Nails at Home: The Acetone Soak-Off Method
This is the standard, widely recommended approach for safely dissolving and removing acrylic nails without damaging the natural nail underneath.
- File down the top shine. Using a coarse file or buffer, gently rough up the glossy top layer of the acrylic on each nail. This breaks the acrylic’s protective seal, allowing acetone to penetrate and soften the product more effectively. You don’t need to file all the way through — just enough to remove the shine and create a slightly matte surface.
- Protect your skin. Apply a thin layer of cuticle oil or petroleum jelly to the skin around your nails to help protect it from the drying effects of extended acetone exposure.
- Soak cotton in pure acetone. Saturate a cotton ball or pad with 100% pure acetone for each nail — enough that it’s fully wet but not dripping excessively.
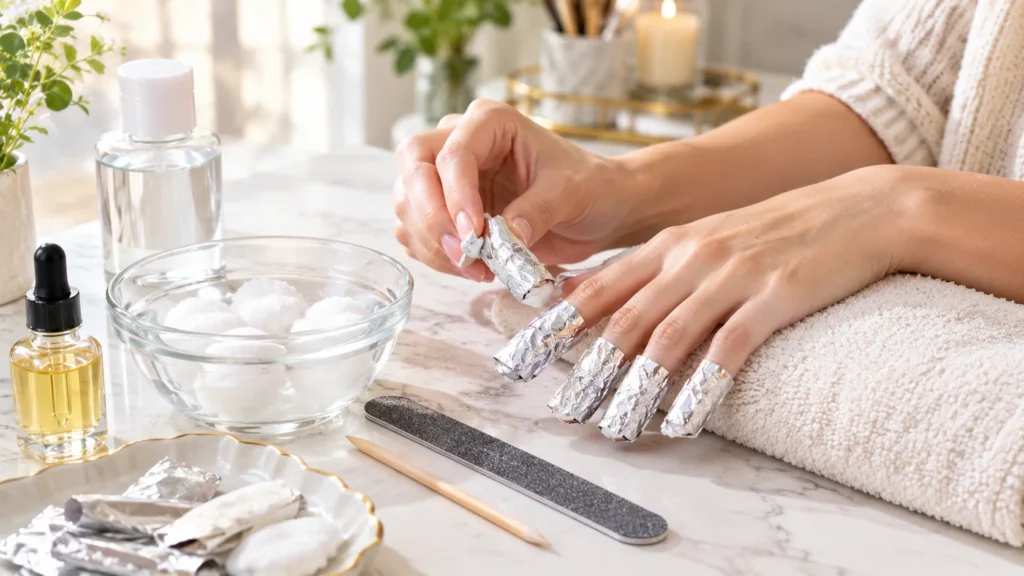
- Wrap each nail. Place the soaked cotton directly on top of the nail, then wrap a small piece of foil around the fingertip to hold it in place and help retain heat, which speeds up the acetone’s effectiveness.
- Wait 20 to 40 minutes. Actual time varies depending on the thickness of the acrylic and the product used — thicker or older acrylic builds generally take longer. Check one nail after about 20 minutes by gently pressing on the foil-wrapped cotton; if the product still feels hard, rewrap and continue soaking.
- Gently remove the softened acrylic. Once the product has softened, use a cuticle pusher or orange stick to gently push and scrape it away — it should come off with light pressure. If it resists, it isn’t fully dissolved yet; rewrap and soak for another 10 to 15 minutes rather than forcing it.
- Buff and moisturize. Once all the product is removed, gently buff the nail surface to smooth out any remaining residue, then apply a rich cuticle oil or hand cream to begin rehydrating the nail and surrounding skin.

Alternative Removal Methods and Their Trade-Offs
While the acetone soak-off method is the standard, a few alternative approaches exist, each with real trade-offs worth understanding.
The acetone-dip method (soaking fingertips directly in a bowl of acetone rather than wrapping with cotton and foil) can work slightly faster in some cases, but it uses significantly more acetone and exposes more of the surrounding skin to prolonged contact, which can be more drying.
Non-acetone or “acetone-free” removers are generally far less effective at breaking down acrylic specifically, and relying on them often leads to more scraping, filing, or forceful removal to compensate — which increases the risk of nail damage rather than reducing it. These products are typically better suited to removing regular nail polish than acrylic.
Filing the acrylic off entirely without acetone is technically possible but is one of the more damaging approaches if not done by a trained professional, since it’s very easy to file too far into the natural nail plate along with the product. This method is generally best left to a nail technician with the right tools and experience.
Signs You Should See a Professional Instead
At-home removal isn’t the right choice in every situation, and recognizing when to book a salon appointment instead can genuinely save your natural nails from unnecessary damage.
If your acrylics are unusually thick (from multiple fills built up over an extended period), a professional will typically be able to remove them more efficiently and with less soak time than attempting it at home. If you notice your natural nails are already visibly damaged, thin, or lifting before you even begin removal, a nail technician can assess and address the underlying nail condition rather than adding an at-home removal attempt on top of already compromised nails. And if, partway through an at-home attempt, the acrylic simply isn’t softening even after extended soaking, that’s a reasonable point to stop and let a professional finish the job rather than continuing to force a stubborn removal.
Aftercare: Restoring Your Natural Nails
Nails that have just come out from under acrylic are typically going to look and feel more fragile than usual, even with a careful removal — this is a normal part of the process, not necessarily a sign something went wrong. Applying cuticle oil daily for the first week or two helps rehydrate nails that were sealed under acrylic for an extended period. A nourishing nail strengthener, applied as you would a regular polish, can help support nails while they recover their natural thickness and flexibility.
It’s generally a good idea to give your natural nails a genuine break before applying a new set of acrylics — many nail technicians recommend at least a short rest period specifically to let the nail plate recover, though the appropriate length can vary depending on how healthy your nails were after removal.
Common Mistakes to Avoid
Peeling or prying acrylic off before it’s properly softened. This is, by a significant margin, the most common cause of nail damage during removal — patience with the soak time prevents nearly all of the damage acrylic removal is known for.
Using regular nail polish remover instead of 100% pure acetone. Diluted removers are simply not strong enough to break down acrylic efficiently, which often leads to frustration and forceful removal attempts as a result.
Skipping the initial filing step. Without breaking the acrylic’s top seal first, acetone takes significantly longer to penetrate and soften the product, extending the whole process unnecessarily.
Going straight into a new acrylic set without any recovery time. Nails that haven’t had a chance to rehydrate and strengthen after removal are more vulnerable to damage during the next application and removal cycle.
Expert Tips for an Easier, Safer Removal
- Warm the acetone slightly (using a bowl of warm water to gently heat a sealed container, never direct heat) before soaking, since warm acetone tends to soften acrylic somewhat faster than cold.
- Check nails periodically rather than removing the foil wraps all at once — this lets you catch nails that are ready sooner without over-soaking others that need more time.
- Keep a small dish of cuticle oil nearby during the process to reapply to exposed skin if it starts feeling excessively dry partway through.
- If you’re removing acrylics regularly, consider spacing out how often you apply new sets, since giving nails periodic rest is one of the most effective ways to maintain their overall health long-term.
Frequently Asked Questions
How long does it take to remove acrylic nails at home?
The acetone soak-off method typically takes 20 to 40 minutes total, though thicker or older acrylic builds can take longer. Rushing this process by prying off product before it’s fully softened is the main cause of nail damage.
Does removing acrylic nails damage your natural nails?
Not inherently — damage usually results from improper technique, specifically peeling or prying off acrylic before it’s dissolved, rather than from the removal process itself when done correctly with acetone soaking.
Can I remove acrylic nails without acetone?
It’s possible but generally not recommended, since non-acetone removers are much less effective at breaking down acrylic, often leading to more forceful scraping or filing that increases the risk of nail damage.
Is it safe to soak nails in acetone for 30-40 minutes?
Generally yes, when done with proper ventilation and skin protection around the nails, though it can be drying to the surrounding skin, which is why applying cuticle oil beforehand and after is commonly recommended.
Why won’t my acrylic nails come off even after soaking?
This usually means the acrylic hasn’t fully softened yet, often because the top seal wasn’t sufficiently filed beforehand or the soak time was too short for a particularly thick application — rewrapping for additional time is the right next step rather than forcing removal.
Should I file my acrylic nails off instead of soaking them?
Filing without acetone soaking first is generally not recommended for at-home removal, since it’s easy to file too far into the natural nail without professional training and tools.
How do I take care of my nails right after removing acrylics?
Apply cuticle oil regularly and consider a nourishing nail strengthener, since nails typically need time to rehydrate and rebuild strength after being sealed under acrylic for an extended period.
How long should I wait before getting new acrylic nails?
Many nail technicians recommend giving natural nails some rest time between sets, though the appropriate length can vary depending on how your nails look and feel after removal — nails that seem notably thin or damaged benefit from more recovery time before a new application.
Can I use regular nail polish remover to take off acrylics?
It’s not recommended, since standard nail polish remover is typically diluted and much less effective than 100% pure acetone at breaking down acrylic product.
When should I see a professional instead of removing acrylics at home?
If your acrylics are unusually thick, your natural nails already appear damaged, or the product simply isn’t softening after extended soaking, a professional removal is generally the safer choice.
Final Takeaway
Removing acrylic nails safely comes down to one core principle: let the acetone do the work, rather than forcing the product off before it’s ready. The soak-off method takes patience — filing the seal, wrapping nails in acetone-soaked cotton, and waiting the full 20 to 40 minutes — but it’s the difference between healthy nails underneath and weeks of thin, damaged ones. If your acrylics are especially thick or your nails already look compromised, booking a professional removal is a reasonable and often worthwhile choice over pushing through an at-home attempt.

At Decor Artly, we bring art, home decor, and personal style together to create beautiful spaces and inspiring lifestyles. Led by Design Director Roni, we offer curated artwork, elegant home accents, and personalized styling to help you express your unique taste.